| Recognized by the Administrators of this site as an exceptional guide! |
|
| This page is a guide. Guides are essays covering various game topics in more detail and to aid players. As these guides are created by fellow players and wiki users, the POTCO Wiki offers no guarantee of their validity, point of view, or specific approach to a subject. To view all the guides on the wiki, please visit Category:Guides. |

Intro[]
Let me start off by saying this is just how I make signatures/avatars. This isn’t the only way and there could be a better way but I don’t know of any yet. If I find any better ways or if I learn how to do something else Ill be sure to add it in! Ive made close to 200 signatures, avatars, ect. using this.
Editing software[]
I like to use GIMP as my program of choice, and yes for those of you wondering it IS a free program. However be warned this is a bit more complicated than paint. You can download it from here. Gimp Official Site When you first open gimp a toolbox will open, don’t worry you’ll use it in a bit. Once you download you can install it and make sure you leave a shortcut to it on your desktop or wherever you can find.
Screenshots[]
To start off you'll need a picture to edit (No duh Kat). If you don’t know how to take a screenshot in pirates, its simple. Press f9 (or if your computer is stubborn like mine its shift f9).
To get to your screenshots go through My Computer > Local Disk C > Program Files (x86) > Disney > Disney Online > Pirates Online > screenshots.
- HINT Move the screenshot to an easy place to get to such as your desktop.
- HINT It makes things easier if you open the image you want to use in paint first and crop out the part you want to use.
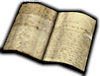
Cropping out your Character
Now open gimp back up and open the screenshot you want to edit. The first thing you will want to do is go under Layer > Transparency > Add alpha layer. This will make it so when you erase around your character you aren’t left with a white background. Now choose from your toolbox the eraser and size it up to around 100. Erase around the parts of your screenshot you wish to keep. (For the sake of my sanity ill just call this part your character). It works best if you choose Brush: Hardness 100. It will look like a dot with no fading around the edges in the list.

It should look something like this after youve finished.(Image on left)
- HINT get as close as you can but don’t try to erase right against your character just yet.
Now go under View > Zoom and choose whatever percent you want (I started at 800 but am now using 400). Now you can size down the eraser to whatever would be easiest for you (I use about 13) and erase right against your character. The end product should look a lot more like your character this way (No arm or face chunks missing anymore, yay!)
- HINT If you press and hold shift with the eraser you can erase in a straight line
Remember the closer you get to your character the more pixilated the image will become so the colors of your character and the background will blend together more. I recommend making sure your standing in front of something that doesn’t match with what your character is wearing.

When you finish, zoom back out to 100% and see how you did.(Should look more like image on right). If you like how you did then good job, if not then don’t worry just try again (practice makes perfect and all that jazz).
Now were going to save your image but we will be going under File>Export (Not File>Save). File save only gives you the options to save as a gimp file while export has all the normal options. Make sure your saving it as .png as the file type because that’s the kind that can handle transparency. Feel free to close out of this image now.
Backgrounds[]
If your trying to find a background obviously google is the first place you think of. Another place I like to use is photobucket. It’s also possible to make your own background but im not the greatest at this yet. (If I get better at this then Ill be sure to add it in for anyone interested).
- HINT As with your screenshot make sure you save your background somewhere easy to access.
Putting the Pieces Together[]
First start off by opening your background in gimp. If your background is larger than 800x800 pixels you might want to consider making it smaller. You can do this by going under image > scale image. You can pick whatever size you want but I suggest not larger than 800x800 and not smaller than 150x150. Once you’ve opened it and changed the size if needing to, go under File > Open as Layer. Find your edited image and open it.
It’s very likely your character is too big for your background. If so were going to do something similar to what I said for resizing the background. Make sure you have your characters image selected (You can do this by going under the toolbox and clicking on that layers from the list). If you right click on this icon a list will pop up and you will choose scale layer. If the character is to big you will bring the numbers down and if the image is to small you can bring the numbers up.

- HINT Remember the bigger an image gets the more it will blur. Also make sure to keep the height and width linked or else you’ll end up looking all squished.
- HINT If you want to have your entire character in the image scale it to the same height as your background.
Once you have your character to a size you like then just pull it to whatever place you want and bam, your done with the basics! (*cheers*) If you don’t want or care about extra details then go under image and choose flatten image. If there are any transparent parts around the edges they will now turn white and you can crop them off if you wish. If not then just save your image and there you have it. (If you’re not done and do want extra stuff then don’t do this part yet.)
Extra Details[]
You’ll see on some signatures a glow around a person, a cool looking border or their name and guild name. Well here’s a few tips on how i’ve learned to do this.
Drop Shadow
To start off make sure you have clicked on whatever layer, from the layer list, you will be adding the drop shadow too. (In this case im going to use your character as the example). Go under filters>Lights and Shadows>Drop Shadow. Note: the drop shadow will be created as a new layer.

A new window will pop up. If you want to change the color of the drop shadow click on the box beside the word color and choose whatever you would like.
The offset X and Y are where the drop shadow will be behind your character (to the left, to the right, above) If you want it to be directly behind your character make sure both X and Y are at 0. The blur radius is how far out the shadow will extend from behind your character. Higher numbers mean farther out. In case the drop shadow is on top of your character you can go under the layer list and drag that layer (still in the list) below the character and above the background.
Text[]
In the toolbox choose the text tool. Left click, hold and drag to create a text box. A new window will pop up which is where you will type in whatever you wish to add. In the toolbox you can choose what font, size and color you want for the text.
If you download a font this is how you install it for use. You probably downloaded the font folder into your downloads folder. Open this up and find the font. Open the font folder and look for the file that’s a .ttf (trueType Font) this will be your font. Open it, this should open up something displaying the font. Top left is a button that says install. Click it and your font will now be able to be used.
Some fonts I like to use are:
· Bleeding Cowboy
· Pieces of Eight
· Rapscallion
· Calligula
If you want to give the text a drop shadow just read back under that section for directions on how to do so.
Changing Specific Colors


There isnt any nessasary reason to do this but its just a fun thing you can add in. To change a specific color (were going to be going from green to yellow) You go under Colors> Hue-Saturation. If you are ok with changing all the colors

just mess with the Hue, Lightness, and Saturation bars until you find something you like. If you only want to change one color, select that color and THEN mess with the bars.
A side note: Ive noticed when doing specific colors, if your character has a warm skin tone (like in sunlight) If you try to change from warm colors to cool ones the skin tone will alse change with it. (vise versa for cool colors).
Water Effect[]

Start off with a new image, it can be any size you want but I suggest close to the size of your image. In your tab for layers right click and choose New Layer-Transparent. Choose your Paintbrush tool and the brush we will be using is called Splats 2. You can choose whatever size you want and 'splat' on the layer you just created.
When the splats look good to you go under Filters>Alpha to Logo>Chrome.
Now when you look in your layer list you will see three layers. Layer#1, Drop Shadow, Background
The only one you need is Layer #1 so you can delete the other two.
You will notice Layer #1 has what looks like two images in it. When an image is like this its hard to edit so create a new layer again. Go under Image>Merge Visible Layers. Now you can edit it like a normal picture. If you want the background to stay transparent export it as a png file and you can use it however you like.
Borders[]
There’s a ton of different ways to create a border for your image, these are just a few ways ive found.
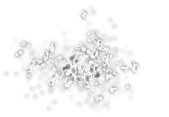
Fuzzy Borders>[]

To get one of these (image on right) go under Filters> Decor> Fuzzy Border. A new window will pop up. Pick whatever color you want it to be. The border size is how far out from the edge of your image the border will go.
Round Borders[]

Go under Filters>Décor>Round Corners.
The Edge radius is how much of the corners you will be seeing. Smaller numbers means more corner, higher numbers means less.
There is the option of adding a drop shadow here but it doesn’t let you have the option of what color you want. If your ok with a black drop shadow, make sure the shadow X and Y offset is 0.
If you want your drop shadow to be a different color read up under drop shadow. (read above)
If you want all of this to be on top of a white background then your fine leaving the box that says Add Background checked. If you want it to be invisible then uncheck that box.
Cubed Borders[]

Go under Filters> Décor > Add Border. Choose whatever color you would like. Border size of X and Y you can mess with to find one you like. I tend to keep them the same.
- HINT Bigger pictures usually require bigger borders.
If your fine with invisible/ partly invisible areas then don’t worry about this step. If you don’t want any invisible parts of your border you can go under your layar list, right click the border and choose Duplicate Border. If you chose to duplicate your border make sure you have chosen your top border layer to work on.
Now were going to go under Filters> Artistic> and Cubism. Tile size is how big or small the cubes will be. Tile Saturation is how much of the cubes will be visible. The tile Saturation will be how much of the cubes you can see. I highly suggest you play around with this and see what you like best.
Beveled Borders[]
Go under Filters>Décor>Add Bevel. Beveled borders are more subtle, if you want it to be more visible use more than one.
Other Uses and Outro
In case you think this is to hard or you just dont want to try this guide thats fine this may not be for everyone. This guide also works for making signatures (  )The only part of the guide you will need for those is what is under Extra Details If you have any questions or comments feel free to post them! If you want to post what you create feel free to do that also. I hope this helps you in some way and good luck!